Provisioning AWS Infrastructure with Terraform: Creating EC2 Instances, S3 Buckets, and DynamoDB


As the title suggested we will be creating services or resources on AWS.
Before we start with the project some pre-requisite:
1- Create AWS IAM User and give Admin, S3, and Dynamodb full access and generate Access Key to connect your System with the AWS console.
2- Download Terraform extension in Your VS Code, it helps you with writing code efficiently.
We create an aws-project folder and inside the folder, we will build our terraform config files.
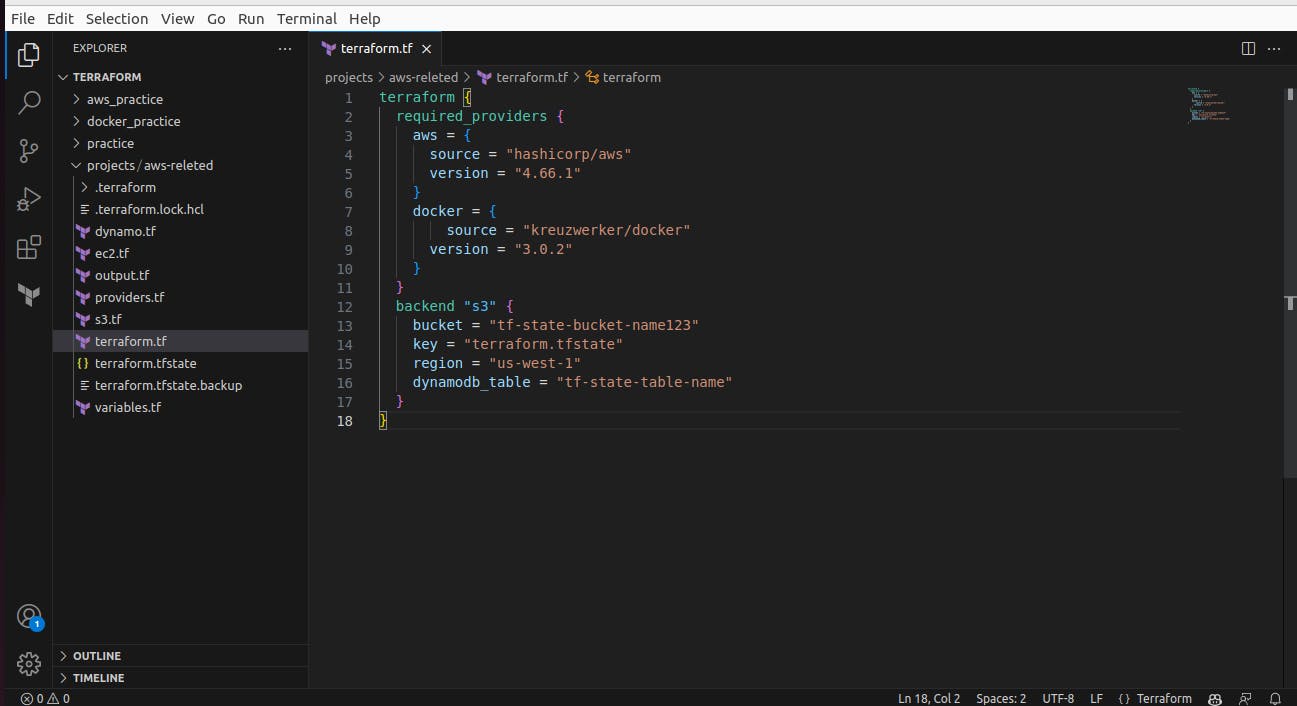
First, we create terraform.tf file where we add - required providers for aws and I also added a docker provider but it's not needed for this project so you can skip adding docker

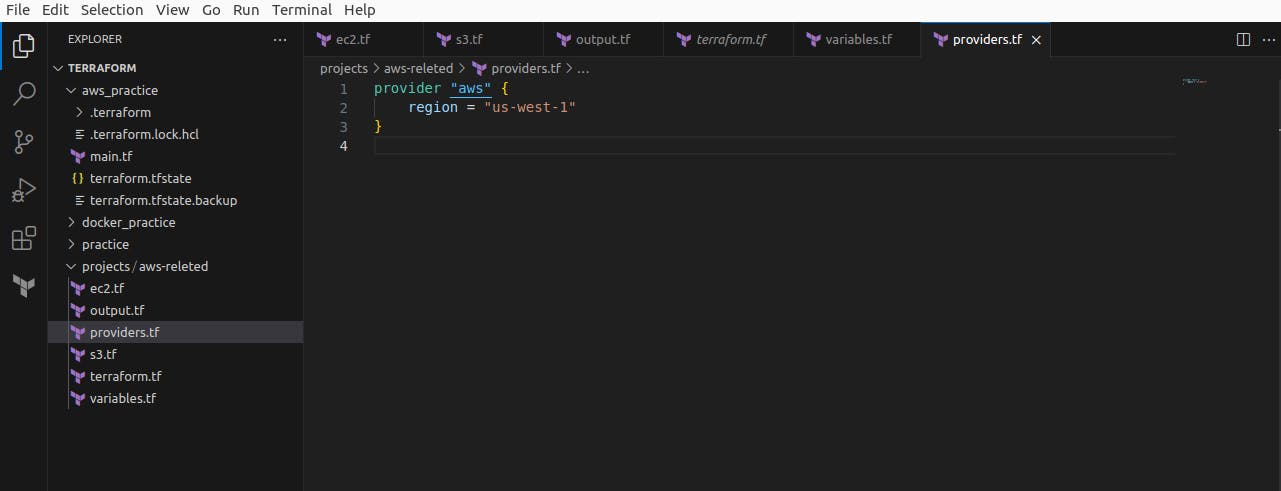
Next, we create providers.tf where we add - aws region where the resources will be built
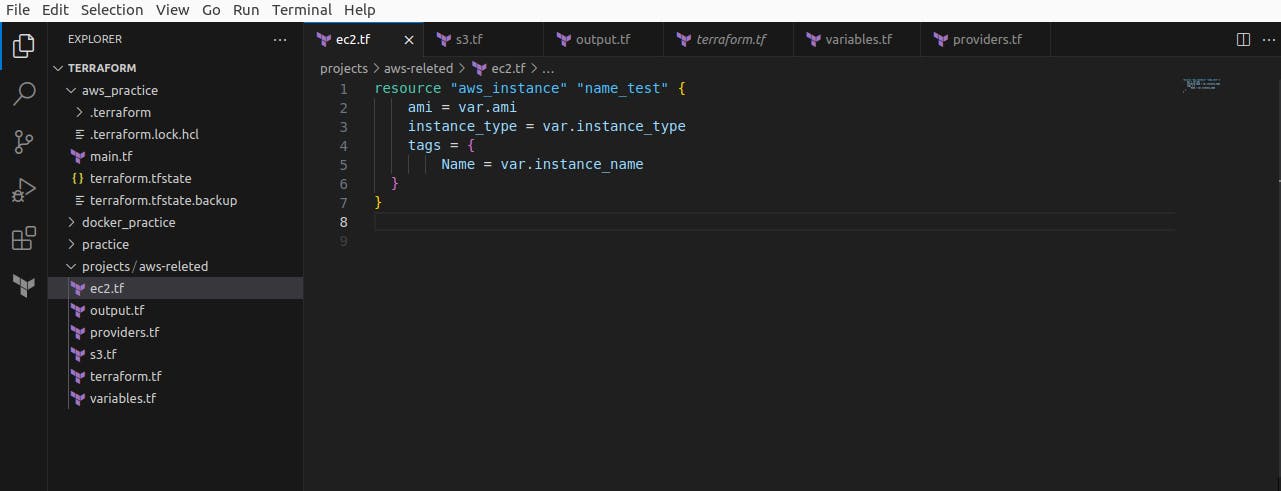
Next, we create ec2.tf and add - resources for AWS instances and provide ami, instance type, and name, but all the input we will add from the variable.tf file.
Next, is the output.tf file which will give you an output for instance public IP address.

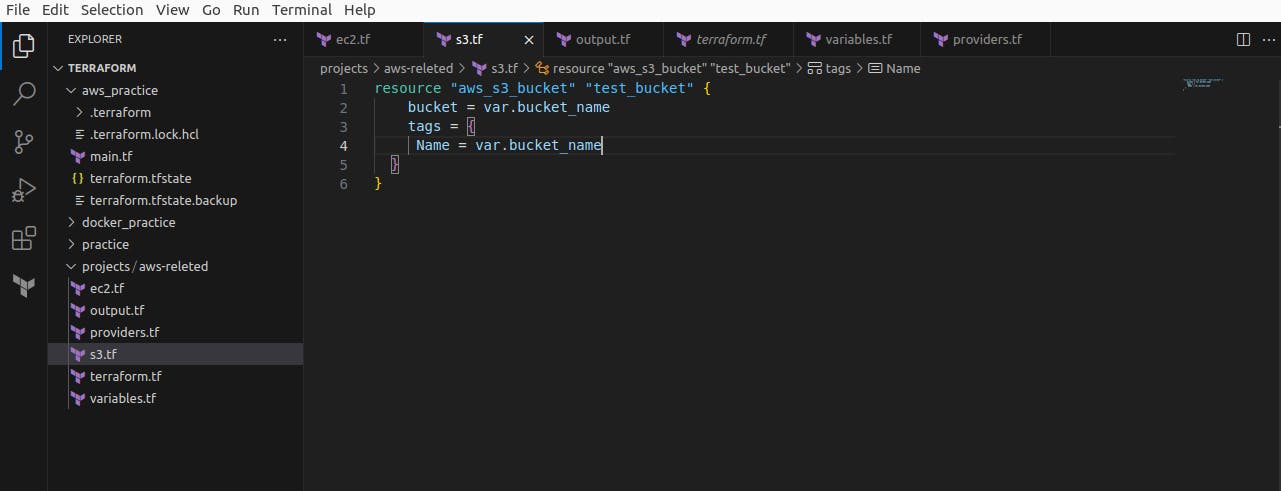
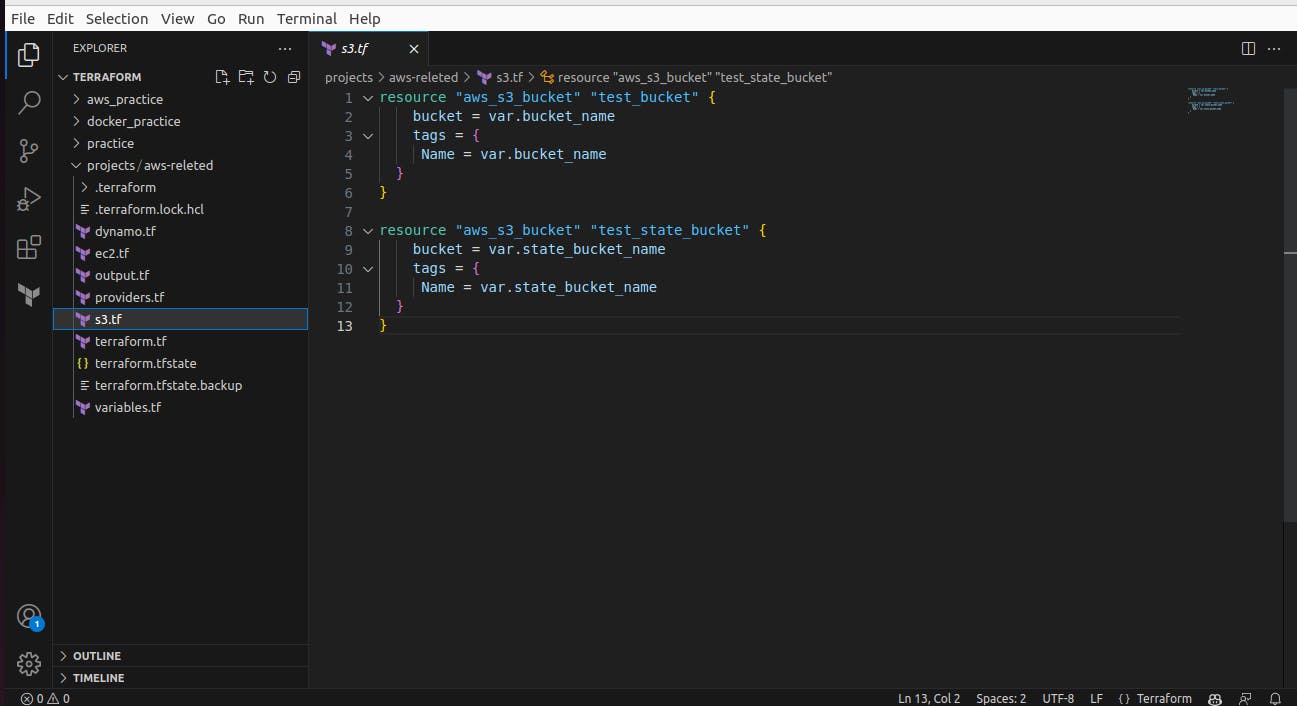
Next, we create S3.tf for - create resource for the S3 bucket
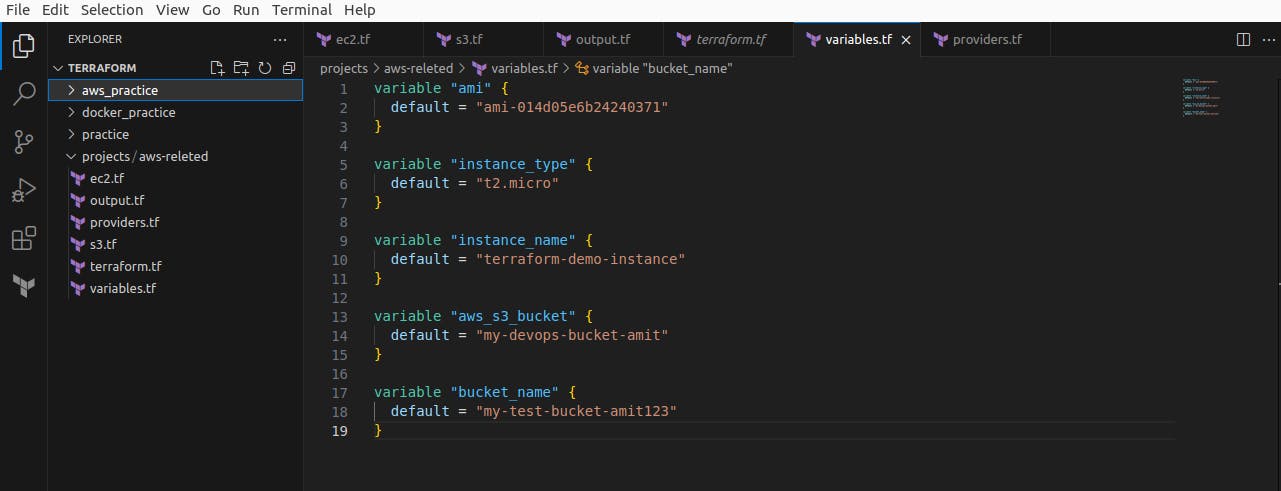
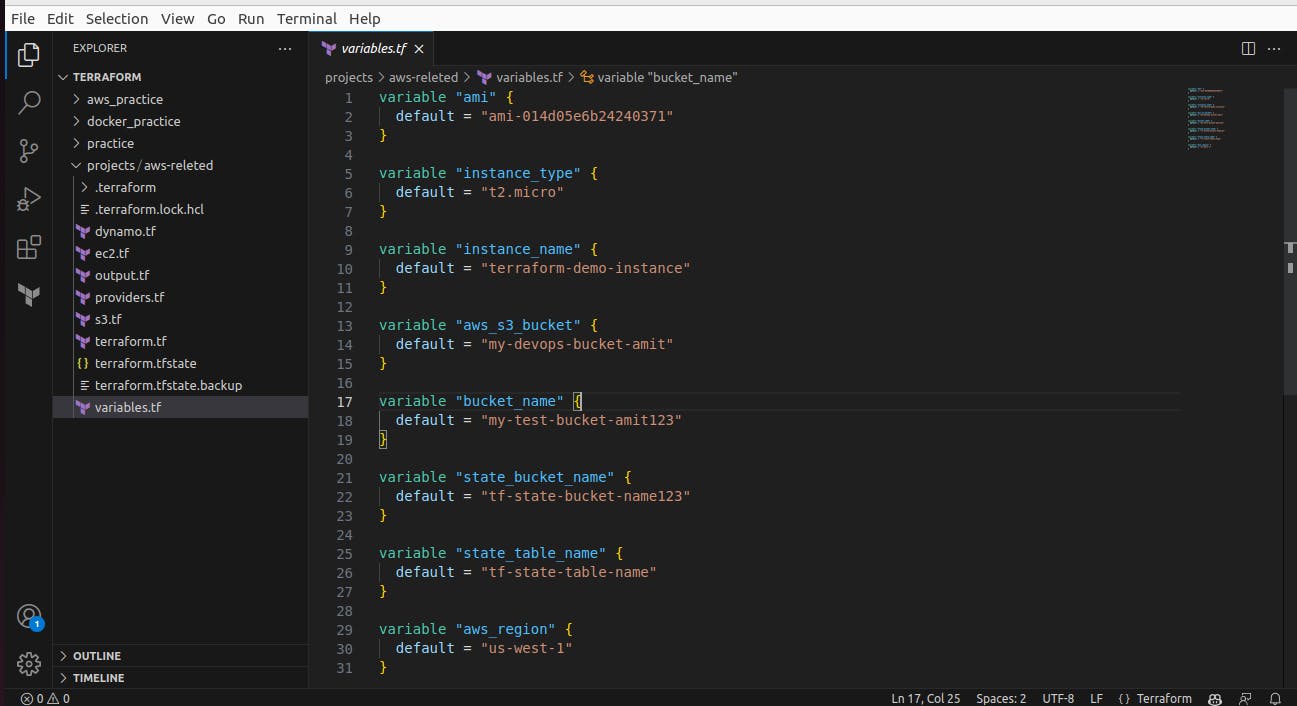
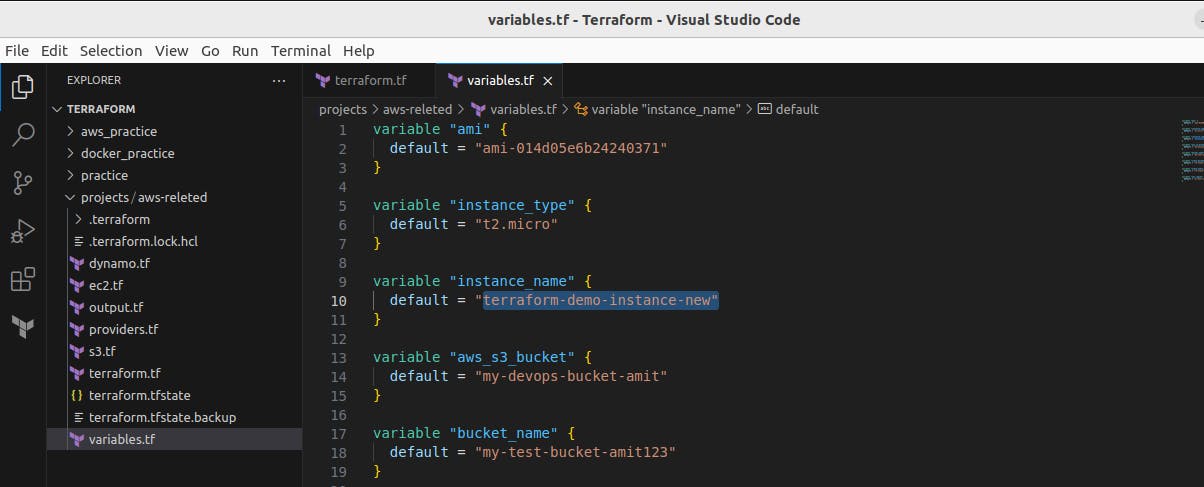
Next, we create variables.tf and add all input to be used in terraform code
The variables.tf file in Terraform is a configuration file where you define variables that can be used throughout your Terraform code. It serves as a central location to declare and manage input variables for your infrastructure configuration.
By utilizing the variables.tf file, you can enhance the flexibility, reusability, and maintainability of your Terraform code. It allows you to parameterize your infrastructure configurations, adapt them to different environments, and facilitate collaboration among team members.
Now open your terminal in your location path of the working directory, we use VS Code to write code and use the terminal to execute commands because it gives good user interfaces to work with and run the command terraform init to initialize the code.
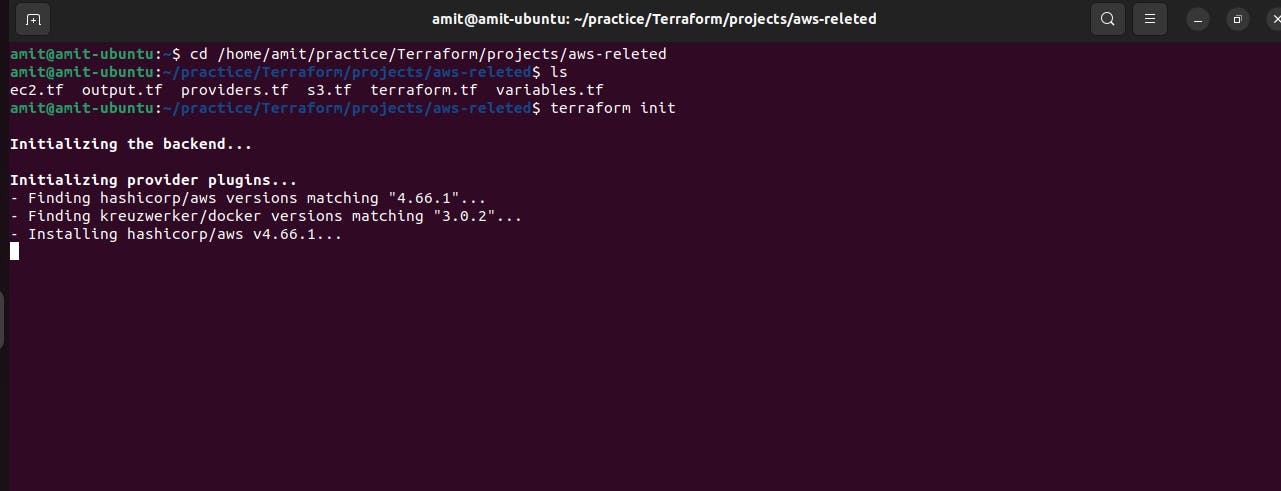
As we can see after terraform init an terraform.lock.hcl file is created, on the left side under the aws-related folder.

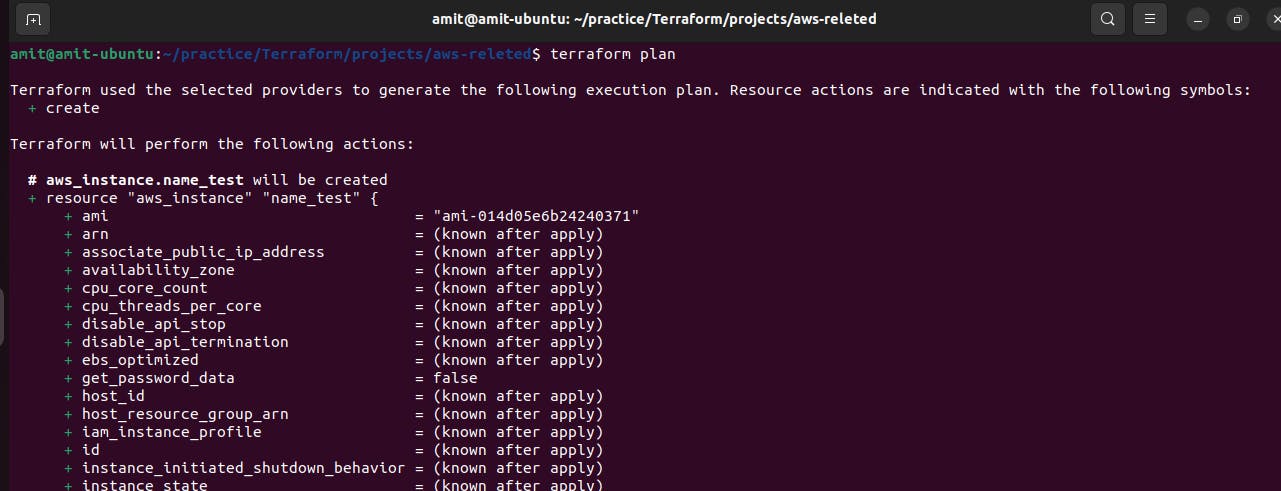
Now, we run terraform plan command.
The terraform plan command in Terraform is used to create an execution plan. It analyzes your Terraform configuration files, compares them with the current state of your infrastructure, and produces a detailed report of the changes that Terraform will make when you apply the configuration.
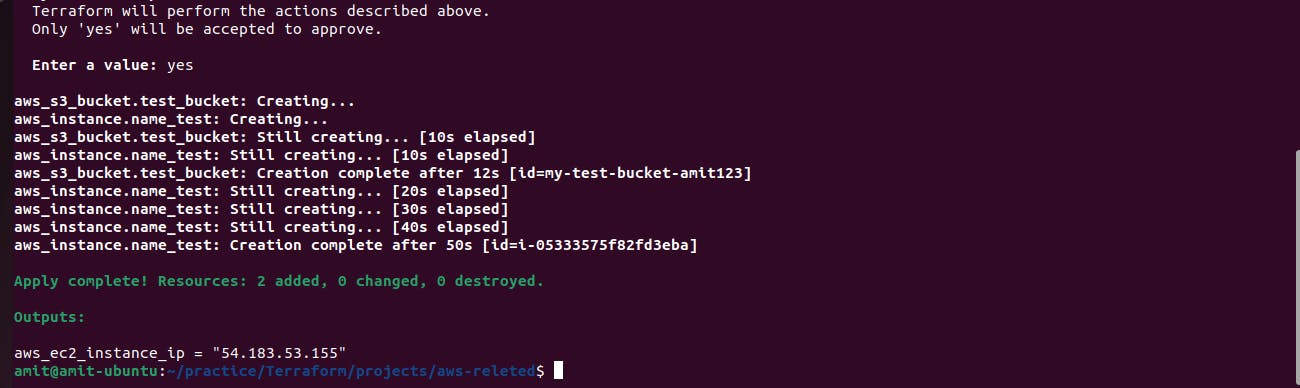
After the Terraform plan checks out okay then we execute the command terraform apply
The primary purpose of terraform apply is to provision infrastructure resources based on your Terraform configuration. It reads the configuration files, communicates with the provider APIs (such as AWS, Azure, or GCP), and creates or modifies the necessary resources to match the desired state described in your code.

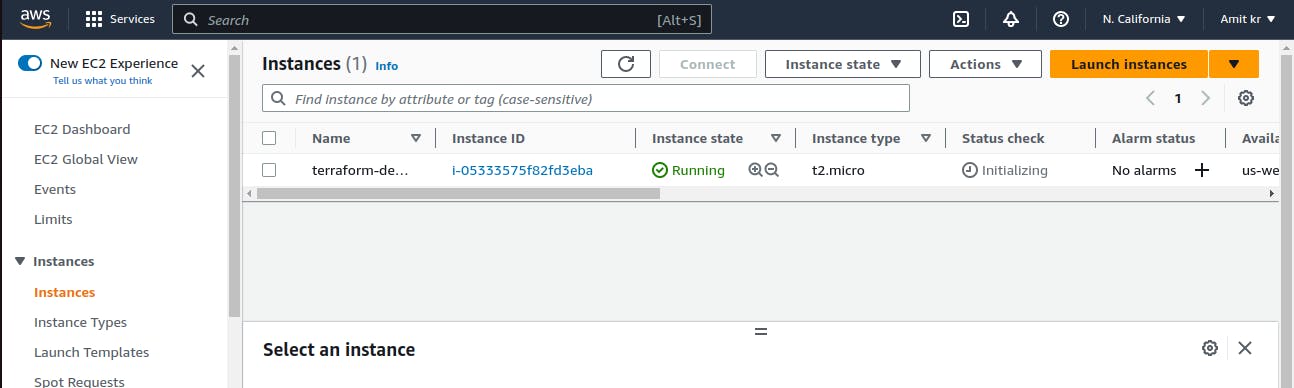
It shows that 2 resources created and added which are the Ec2 instance and S3 bucket and also provided the aws-ec2-instance public IP address
Ec2 instance created
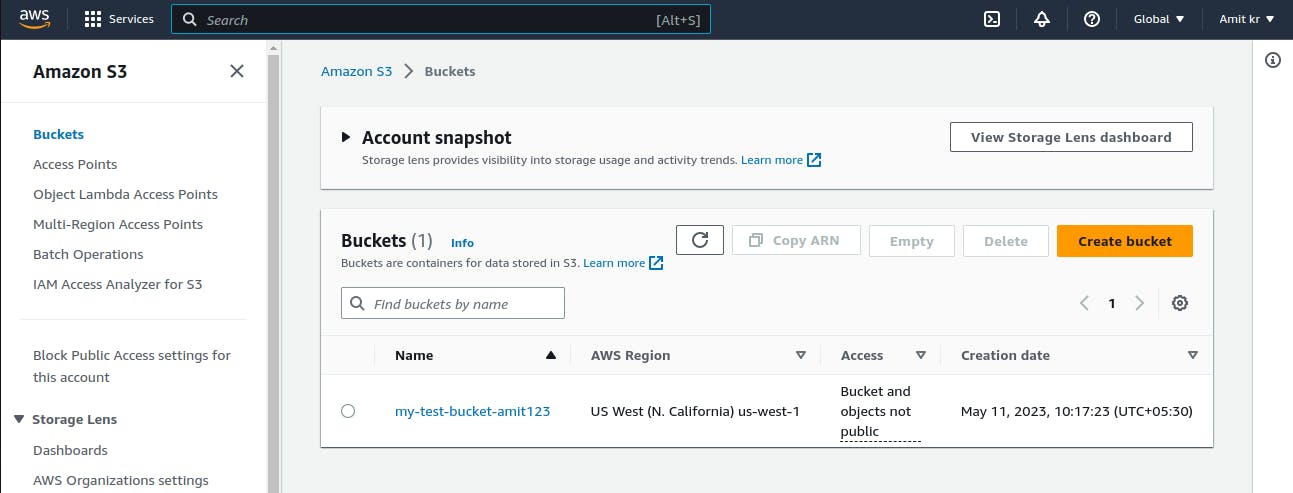
And also S3 bucket
terrafrom.tf state file is created after terraform apply.
The Terraform state file is a critical component in Terraform that keeps track of the current state of your infrastructure. It stores information about the resources you manage, their configurations, and their relationships.
the Terraform state file is like a record or database that Terraform uses to understand the state of your infrastructure. It keeps track of what resources have been created, what their current settings are, and how they are connected to each other.

terraform state list command is used to list the resources that have been created

Now, we create another s3 bucket to store terraform State file
The Terraform state file can be stored in a remote backend, such as an S3 bucket, Azure Storage Account, or a centralized Terraform Cloud workspace. This is often recommended for production environments because it provides several benefits, including security and collaboration. and follow appropriate security measures to protect your infrastructure's sensitive information.
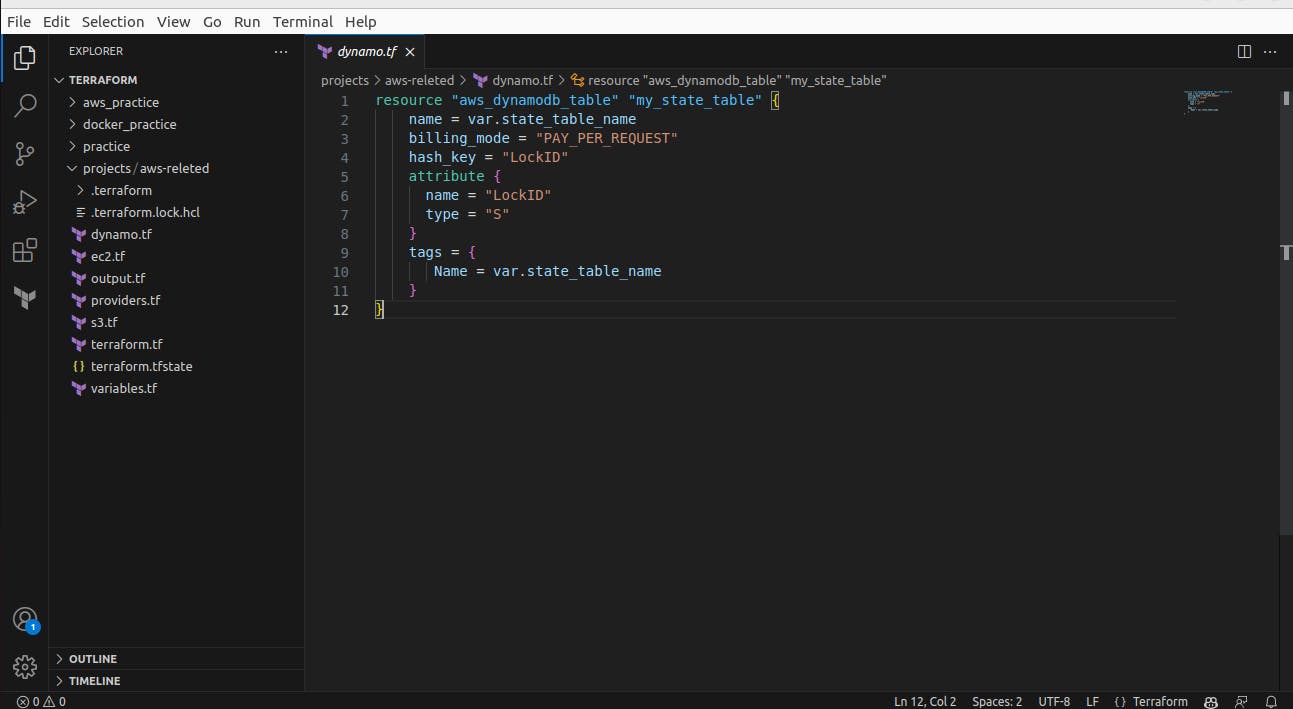
Now we add another terraform file to create dynamodb
And we will also add a remote backend in terraform.tf file to store terraform.tfstate file in the S3 bucket in dynamodb table
Creating an S3 bucket and a DynamoDB table to store the Terraform state file is a recommended practice when using Terraform in a production environment.DynamoDB is often used in conjunction with S3 to provide state-locking functionality. It provides several advantages, including improved security, collaboration, and reliability. Here's why it's beneficial to use S3 and DynamoDB for storing the Terraform state file for - Security, Concurrency and Locking, Collaboration, Reliability and Backup, and Locking with DynamoDB.
Note: For now we comment out the backend syntax because first, we need to create an S3 bucket for it then after that backend initializes.

Added variables for another S3 bucket and dynamodb and AWS region,
Here's a simple tip when writing names - always use lowercase, otherwise, it will give errors.
Now we again run the command terraform init because we added a new file and backend and make some changes in the code.
As we can the resource for the S3 bucket and dynamodb is been initialized before we initialized the backend.

Now we remove the comment-out from the backend from terraform.tf file because the S3 bucket and dynamodb table has been initialized.
After removing the comment-out for the backend we again run terraform init to initialize the backend resource.
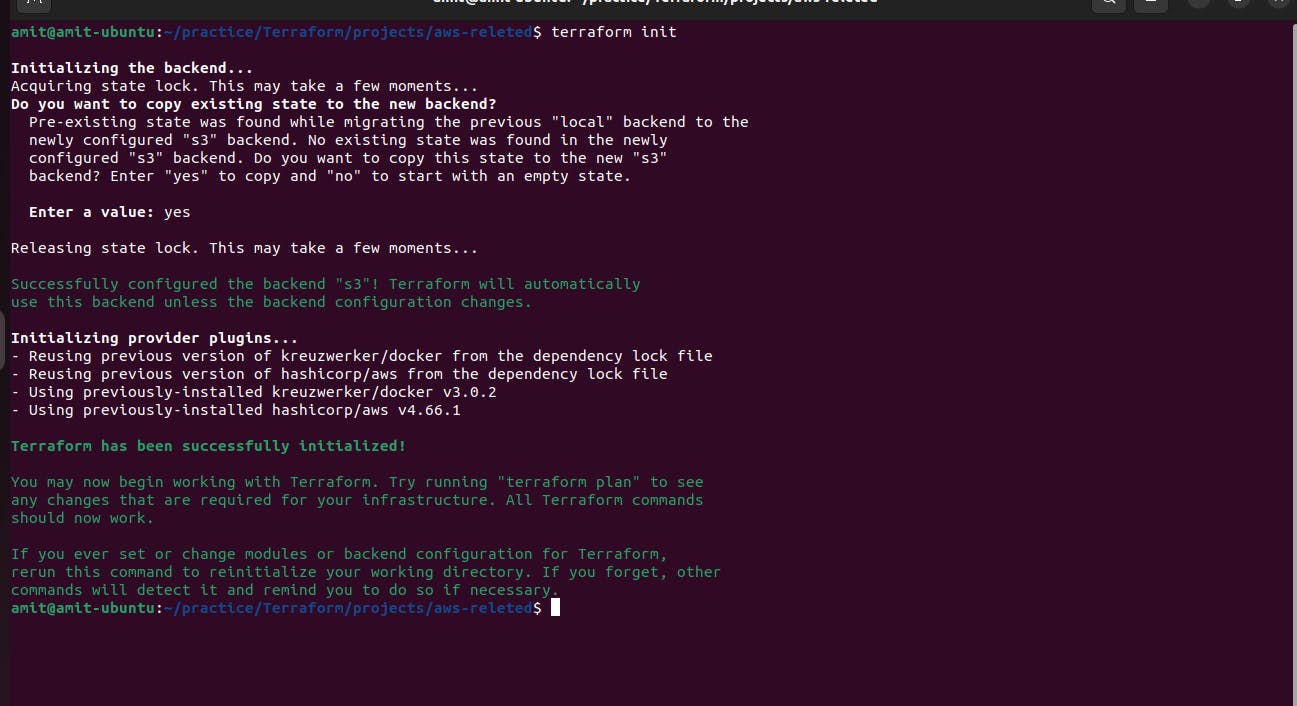
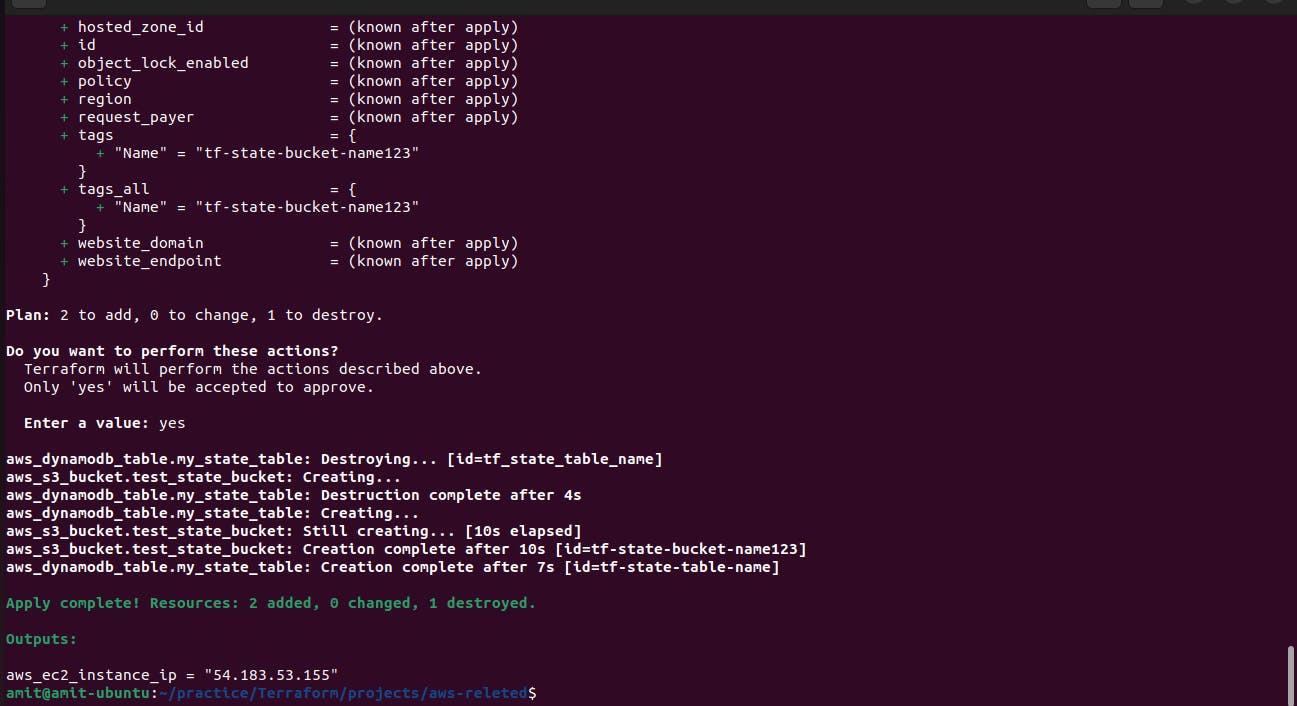
After everything checks out Okay. Now finally we can run the command terraform apply to execute the Terraform code to build the additional resources.

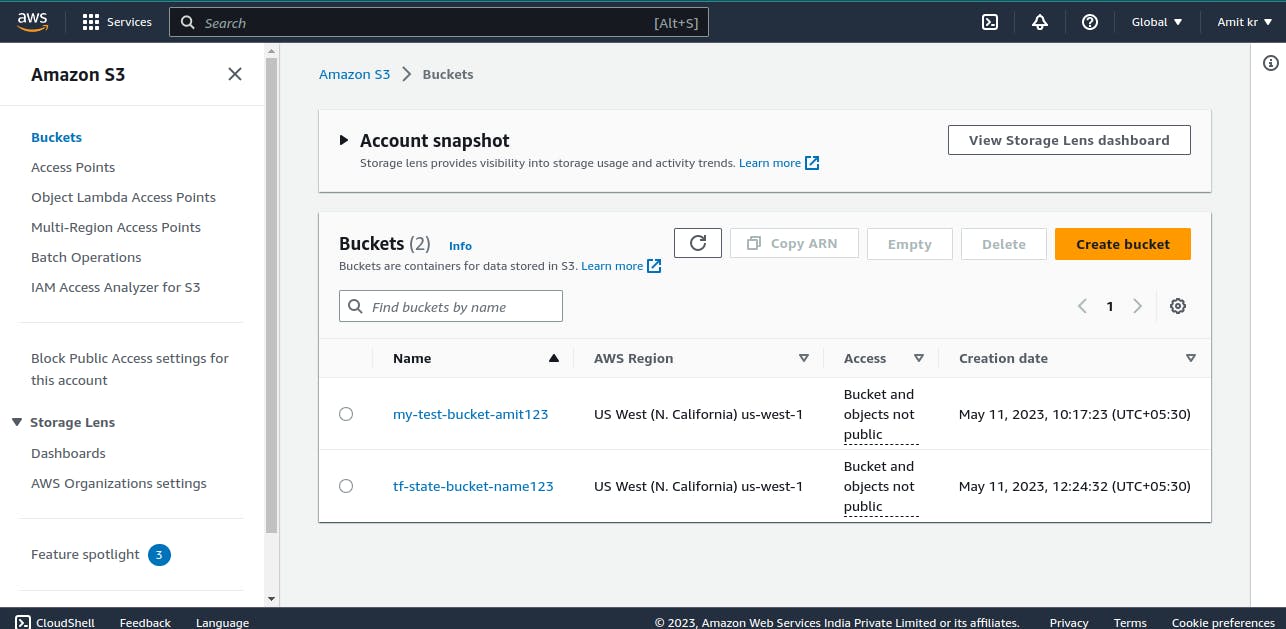
The second S3 bucket is created for storing state file.
When you store the Terraform state file in an S3 bucket, Terraform will retrieve the state file from the S3 bucket during execution. By leveraging an S3 bucket as a remote backend for the Terraform state file, you can effectively manage and share the state file across your team while maintaining the consistency and integrity of your infrastructure state.
terraform state list shows all the resources that have been created

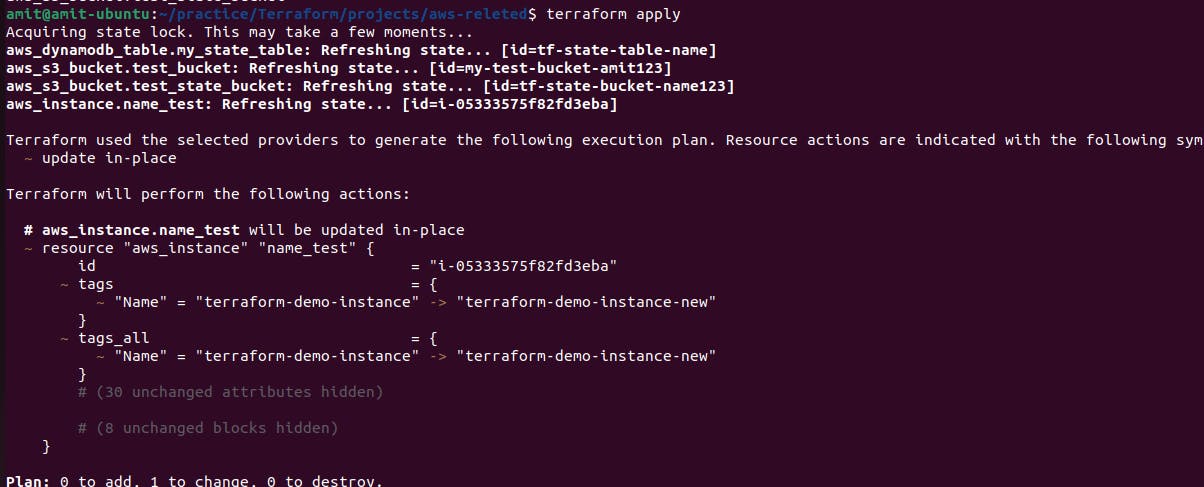
Now we change the Ec2 Instance name to see how state locking works.
As we stored the state file in the S3 bucket in Dynamodb table. Now, terraform will retrieve the state file from the S3 bucket during execution. and state locking will be initialized from now on. State locking in Terraform is a mechanism that ensures the integrity and consistency of the state file when multiple users or processes are working on the same infrastructure. It prevents conflicts that can arise from concurrent modifications by different entities.
Now if we do terraform apply it will initialize the code and update the name of the instance. and also ask for permission. As yes or no to confirm to apply the change. But before giving permission let's see how state locking works.
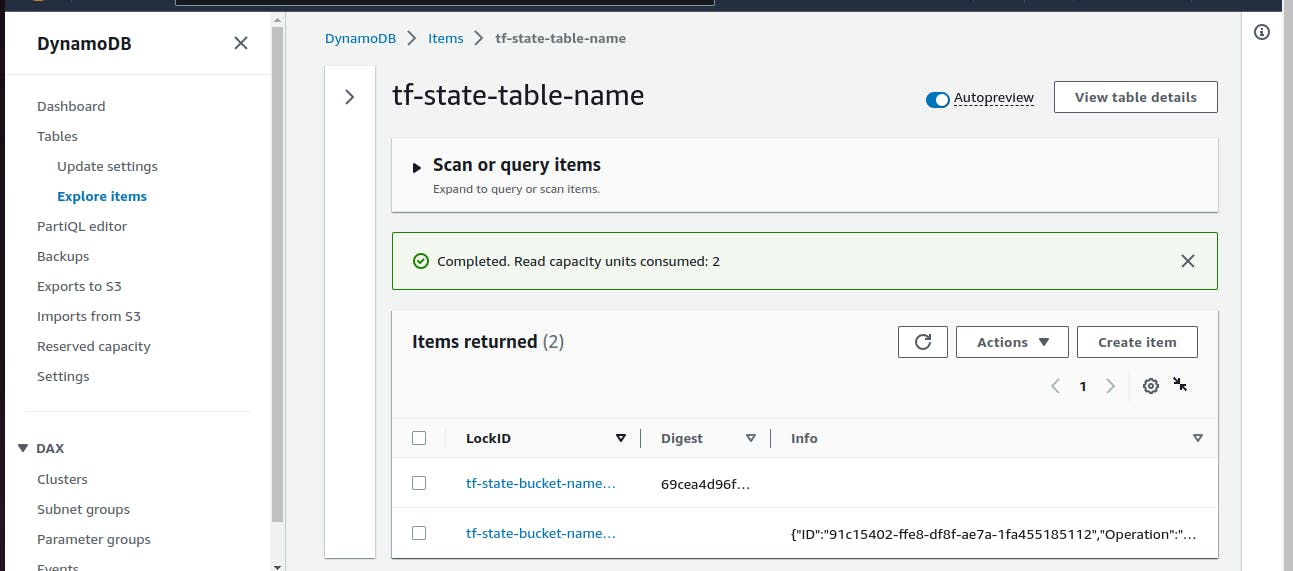
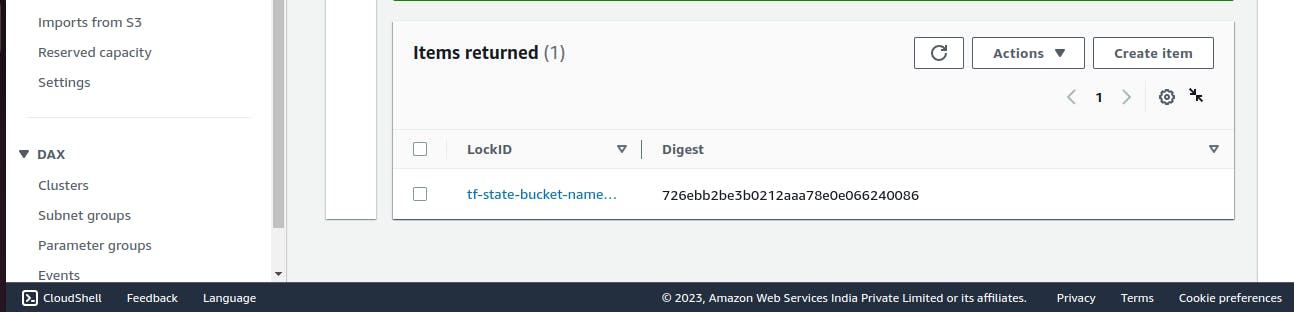
Go to the DynamoDB table and select the table

As we can see the state file is locked for the moment until user completed his/her task
Now, we enter "Yes" to release the lock and apply the change

As we can see the lock has been released.
Note: Now to delete all the resources created by Terraform we run the command terraform destroy.
The terraform destroy command is used to delete or destroy all the resources managed by Terraform within a specific configuration. When you run terraform destroy, Terraform identifies all the resources created by your configuration and takes the necessary steps to delete them
Thank you for taking the time to read my blog! I appreciate your interest and hope that the information provided was helpful to you. If you have any further questions or feedback, please don't hesitate to reach out. Your support is greatly appreciated!